This post is chronologically out of place. It should have been posted before I considered spray drying. I'm not sure of its future viability in 3D printing, as the particle shape it creates dosen't seem conducive to spreading (see previous posts). Still, a fair bit of engineering and thought went into this project so I thoght it might be of future help. I present it here as food for thought.
In order to fully mix the ceramic body, it was first wet mixed in slurry form and then completely dried. It was now in lump form. The question was how to get this stuff down to 200 mesh size. I used a combination of jaw crushing and plate milling, but that only got it down to about a 60 mesh. I could have tried sieving the material by hand but the yield would not have been very good (most of the material would not have passed 200 mesh; our plate mill creates -60 mesh material). In its dry state, clay is quite friable. All I really needed was a system that would physically rub the clay against the screen. This rubbing would break down the clay and get it past the screen.
Enter: Hyojin Lee
Hyojin works in the Engineering Department here at AU. He introduced me to a machine he had designed a while back. The machine was designed to mill alumina fibers. It used a rotating rotor with 8 metal rods which rubbed the fibers against a coarse screen (an 8 mesh screen). In doing so, it broke the fibers down, essentially acting as a mill. The beauty of this system was that it was gravity fed, so that there was always material in contact with the screen. Furthermore, the trough which supported the screen was spring-loaded and could travel independently of the rotor. The springs pulled the screen upwards, ensuring contact between it and the rotor blades. This was important so it could adjusted contact as things wore down.
The one issue with using it in my application was that my material and screen were much finer than what the machine was built for. The original rotors were much too coarse and wouldn't have made enough contact with my finer screen and materials. I needed something more pliant.
My solution was to replace the hard metal rotors of the original design with door brushes made of short nylon fiber (courtesy of MSC). These brushes gave me enough rigidity to force the clay against the screen, but enough flexibility that they could better account for irregularities in the geometry of the system. Their softness was also a good thing, given that a 200 mesh screen is fairly thin and wouldn't hold up to constant contact with metal rotor blades for very long.
The following images are a brief overview of the project.


The unmodified unit (left). On the right, the door brush material I bought came in 72" lengths. I cut it down and drilled the holes for it on my CNC mill (right). In fact, all parts were milled prior to assembly (CNCing is perfect for this type of work).


All critical parts were modeled in Rhino prior to starting, so I knew what lengths and what size holes to cut. Toolpaths for everything were created in RhinoCam. In order to ease alignment, I milled out recessed areas on the two end plates for the rotors. This allowed for a slip-fit (left). The image on the right shows all the components before assembly.

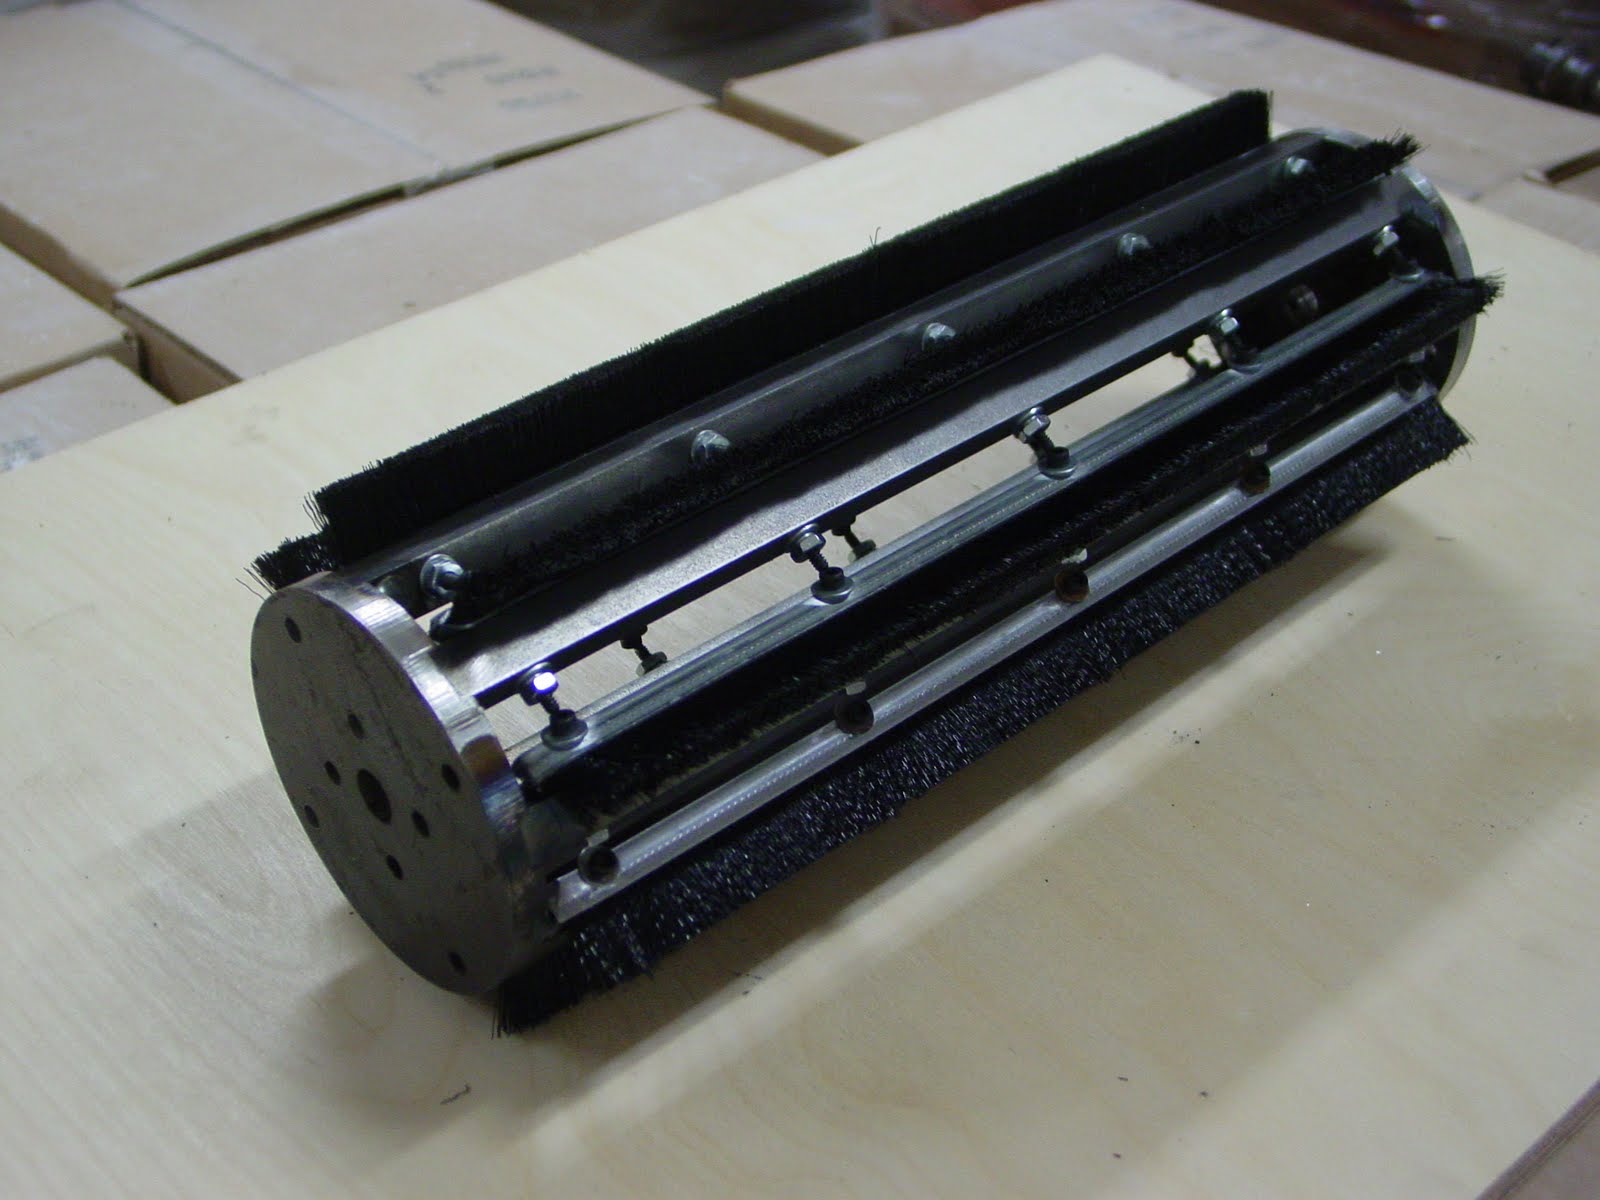
The rotors were welded in place. The brushes were then attached using hex bolts (in case I ever need to replace them).This thing weighs a ton... almost literally.


Detail of brushes and bolts (left). On the right, the original rotor, and its replacement, the newly designed brush-rotor.


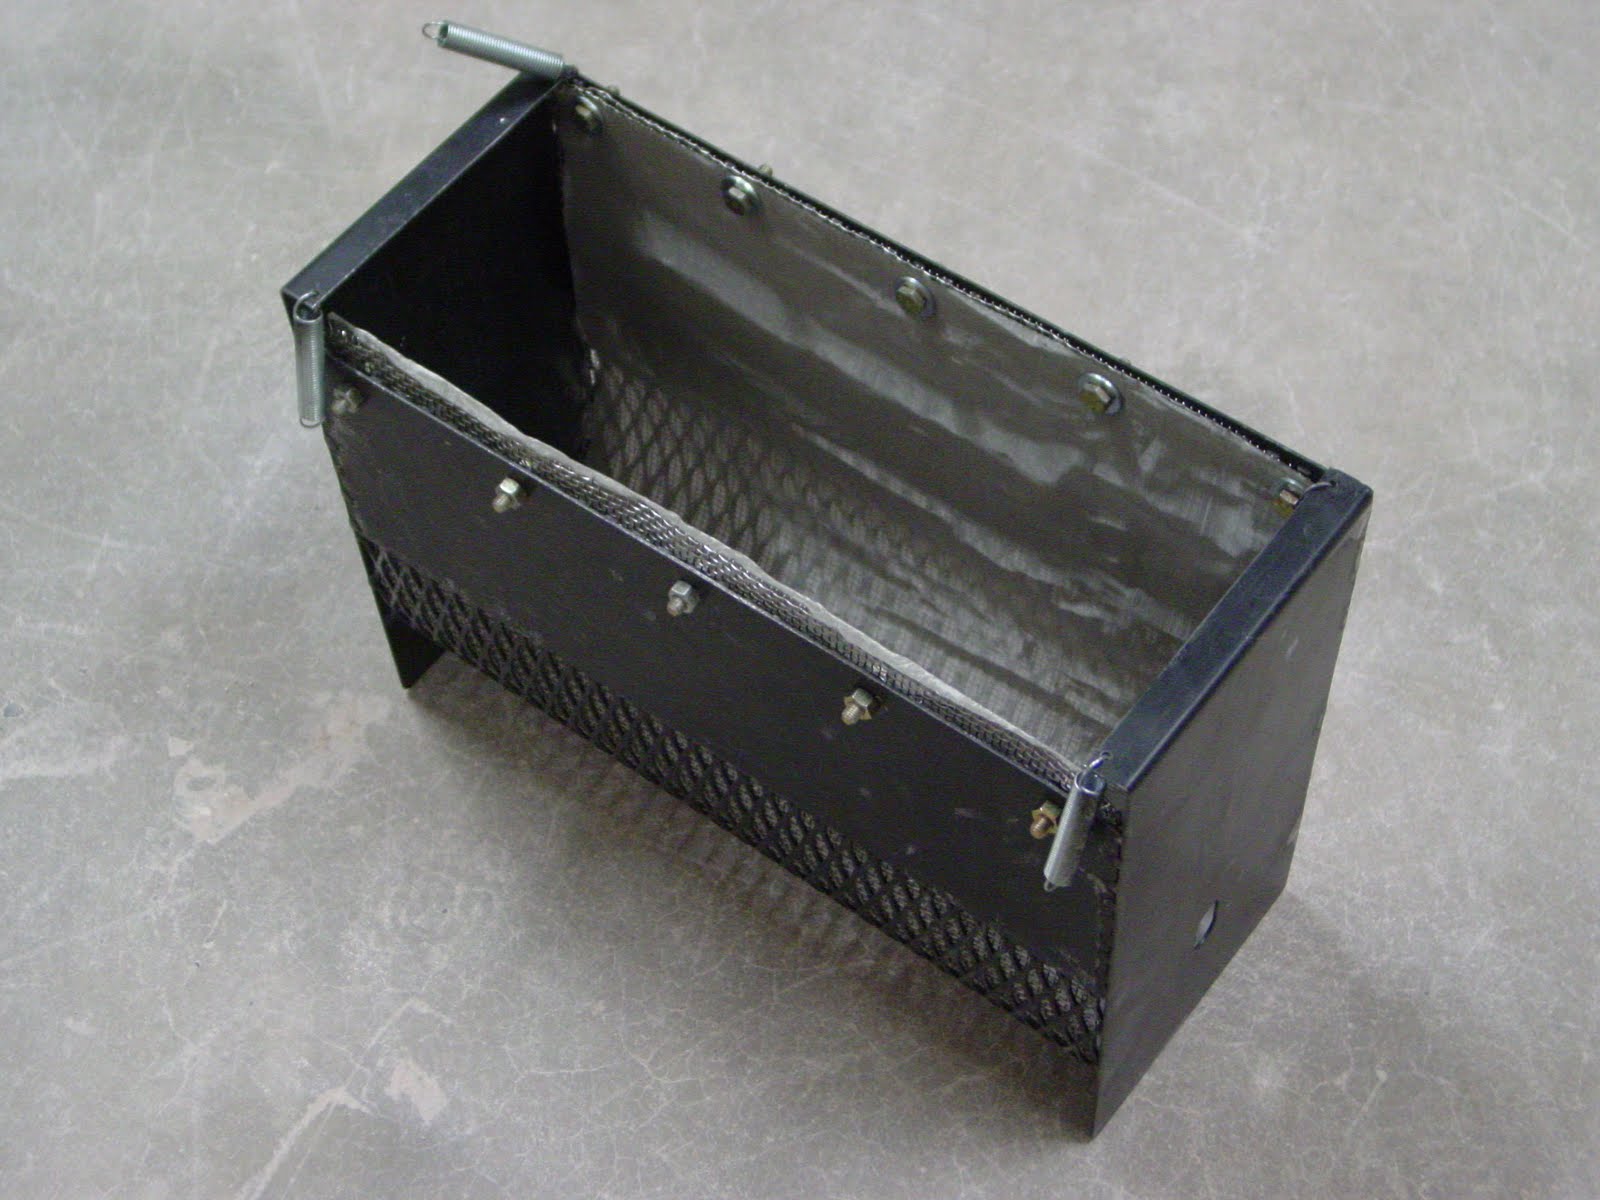
The metal trough has an arc-shaped bottom which is slightly larger than the diameter of the rotor assembly (top left). This ensures good contact between the rotor blades and the screen. In the top right image, a closeup of the screen layers. The finer screen is the 200 mesh count. I decided to back this up with an 8 mesh screen for extra support. Both screens are stainless. The bottom image shows the trough fully assembled. Note the dangling springs. These pull the unit upwards towards the rotor during use.


On the left, a view of the rotor after its been loaded with material. On the right... -200 mesh material collecting below the machine after running it for several minutes.
Here is a video of the whole process in action... http://www.youtube.com/watch?v=3qqzw2xjciM
No comments:
Post a Comment